Questions
 |
How
do I set breakpoints, set watches, and set
through an executing program line-by-line?
Answer |
QUESTION:
How do I set breakpoints, set watches,
and set through an executing program line-by-line?
ANSWER: We
will use the program guessage.cpp as our
example. Note that we are using Visual C++
version 6. However, the steps in Visual C++
version 5 are very similar. Open Visual C++.
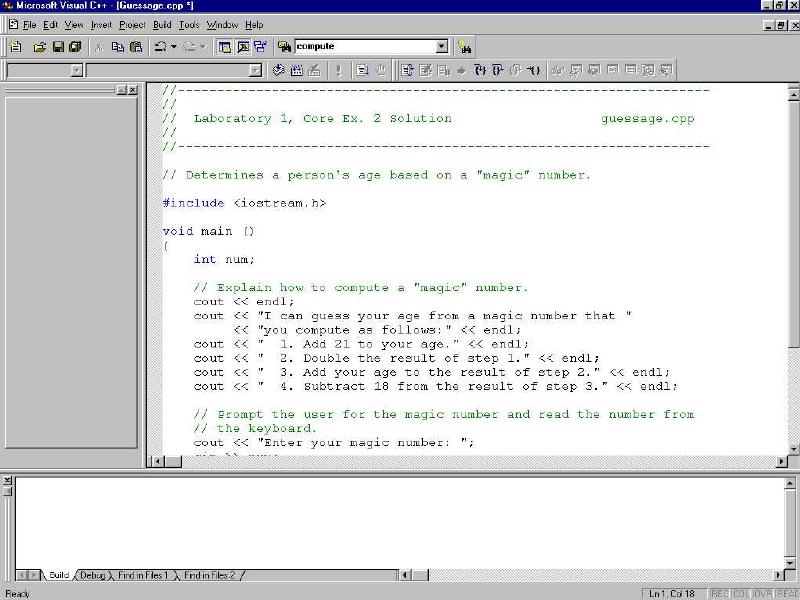
1. You begin by
opening the file guessage.cpp as shown in
the Visual C++ Build Tutorial.
Visual C++
will then display the file guessage.cpp in
the code window
2. Once the file guessage.cpp
is open, you build an executable version of
the program, as shown in the Visual
C++ Build Tutorial: Select Build
| Build. Visual C++ will ucancode.net if
you want to create a default project workspace.
Select Yes.
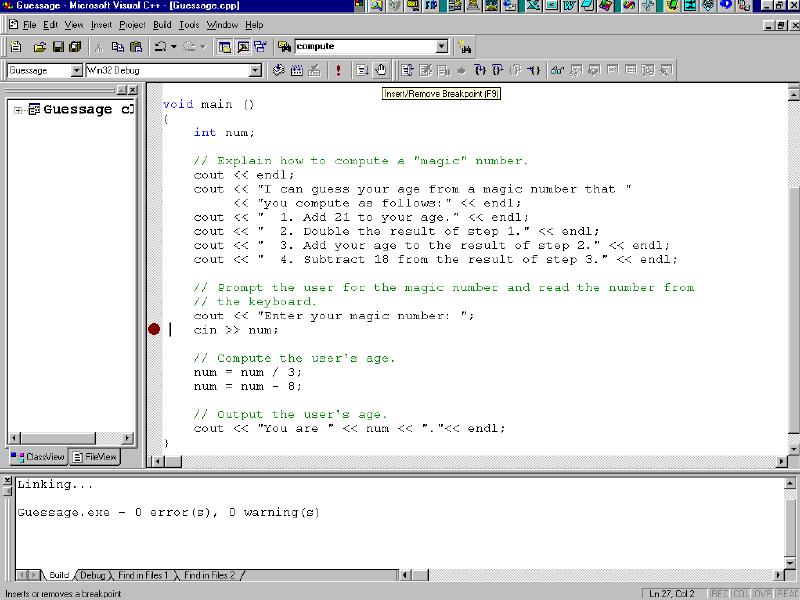
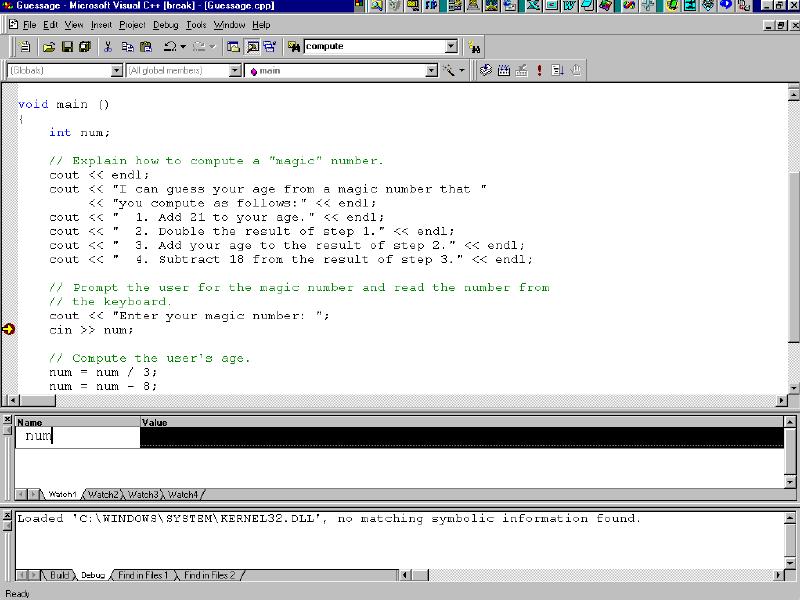
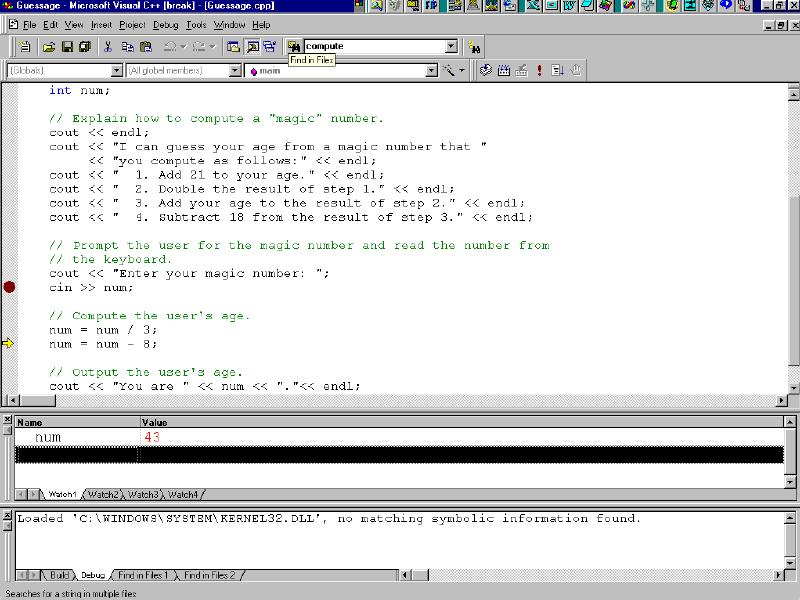
3. Set a
breakpoint at the following line by clicking the
cursor on this line, and then clicking on the
"hand" (Insert/Remove Breakpoint). A red
breakpoint "stopsign" appears to the
left of the line of code.
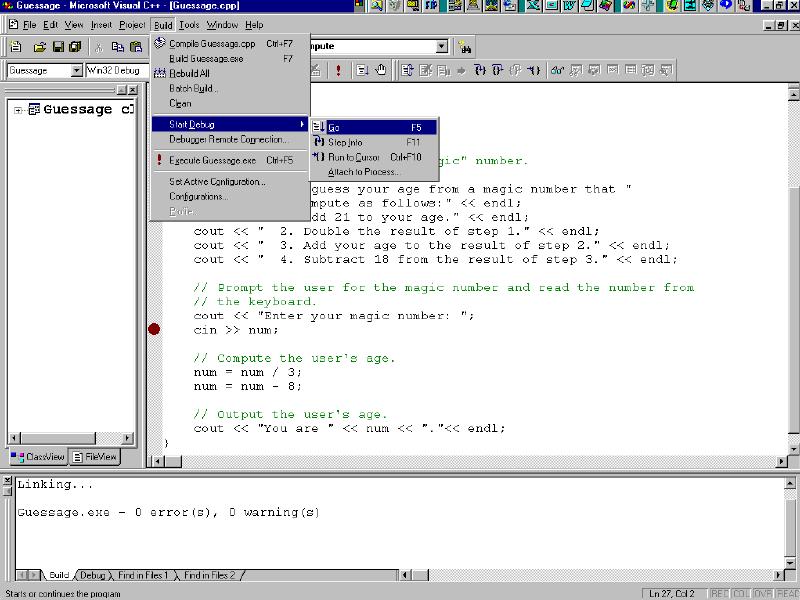
4. Run guessage.cpp
in debug mode by choosing Build | Start Debug |
Go.
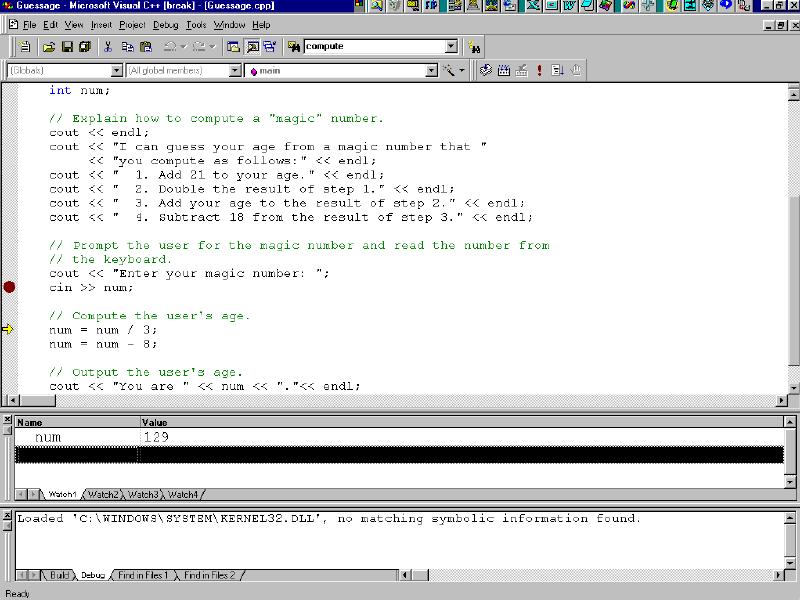
5. Note that
execution stops at the point where the breakpoint
was set.
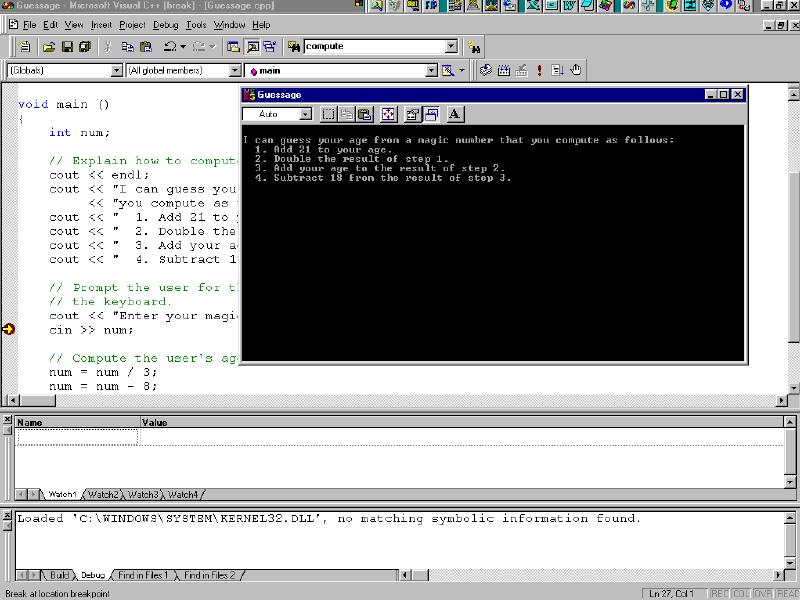
6. Set a watch on
the variable "num" by typing
"num" in the name column of the Watch1
window in the middle of the screen.
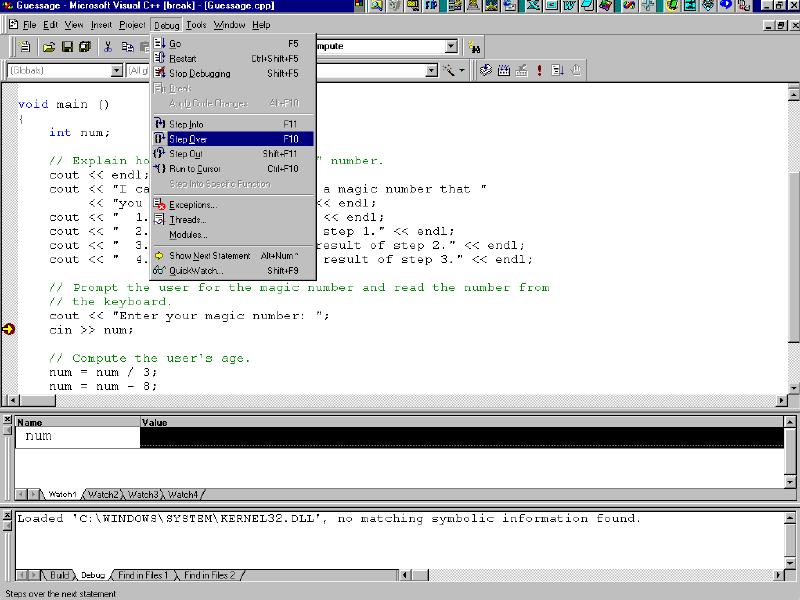
7a. Step to the
next line using Debug | Step Over (or F10).
7b. And enter
your magic number and press Enter.
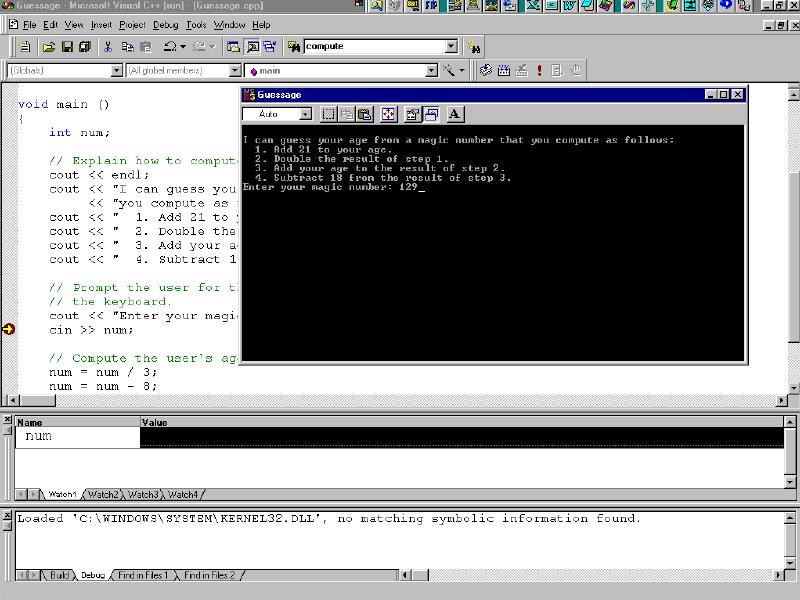
7c. You will see
the yellow arrow (that marks the current line in
the code) has move to the next, non-comment line
of code and that "num" in the Watch1
window has the value you typed in for you Magic
Number (here 129).
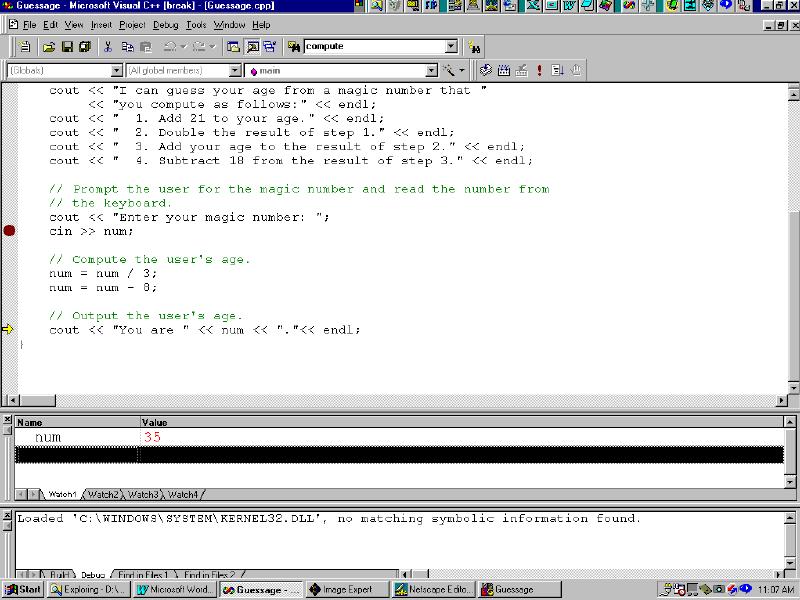
8a. Step to the
next line using Debug | Step Over (or F10)
and see the value of "num" change
according to the calculation executed in the line
of the program. Watch the yellow arrow move
through the code one line at a time.
That's all.
Q: What
is an assertion?
A: An assertion statement
specifies a condition that you expect to hold true
at some particular point in your program. If that
condition does not hold true, the assertion fails,
execution of your program is interrupted, and the
Assertion Failed dialog box appears.
Q: What kind of asserts does Visual C++
support?
A: Visual C++ supports assertion
statements based on the following constructs:
- 'MFC
assertions' for MFC program
- 'ATLASSERT for
programs that use ATL
- 'CRT'
assertions for programs that use the C
run-time library
- ANSI
'assert()' function for other C/C++ programs
Q: What
good are assertions for?
A: You can use assertions to:
- Catch logic
errors
- Check results
of an operation
- Test error
conditions that should have been handled
Q: What
is MFC's ASSERT?
A: A macro definition that allows
you to evaluate an expression. If the expression
is evaluated to 0, the macro prints a diagnostic
message and aborts the program. If the condition
is nonzero, it does nothing. The diagnostic
message has the form
assertion failed
in file _filename_ in line _linenum
where
'_filename_' is the name of the source file, and
'_linenum_' is the line number of the assertion
that failed in the source file. In an MFC ISAPI
application, an assertion in debug mode will bring
up a modal dialog box; this will interrupt or hang
the execution.
:
Are there another MFC assertion macros?
A: Yes, you can also use one of
these:
Q: What
about 'ATLASSERT'?
A: The 'ATLASSERT' macro performs
the same functionality as the '_ASSERTE' macro
found in the C run-time library.
Q: What are the CRT assertion macros?
A: The 'CRTDBG.H' header file
defines the '_ASSERT' and '_ASSERTE' macros for
assertion checking. The result of these macros
are:
- '_ASSERT: If
the specified expression evaluates to FALSE,
the file name and line number of the _ASSERT
- '_ASSERTE':
Same as _ASSERT, plus a string representation
of the expression that was asserted
Q: How do
I chose between '_ASSERT' and '_ASSERTE'?
A: '_ASSERTE' is more powerful
because it reports the asserted expression that
turned out to be 'FALSE'. This may be enough to
identify the problem without referring to the
source code. However, the Debug version of your
application will contain a string constant for
each expression asserted using '_ASSERTE'. If you
use many '_ASSERTE' macros, these string
expressions take up a significant amount of
memory. If that proves to be a problem, use
'_ASSERT' to save memory.
Q: And
about the ANSI assertion funtion?
A: 'assert()' evaluates an
expression and, when the result is 'false', prints
a diagnostic message and aborts the program.
The ANSI 'assert' macro is typically used to
identify logic errors during program development
by implementing the expression argument to
evaluate to 'false' only when the program is
operating incorrectly. After debugging is
complete, assertion checking can be turned off
without modifying the source file by defining the
identifier 'NDEBUG'. 'NDEBUG' can be defined with
a '/D' command-line option or with a '#define'
directive. If 'NDEBUG' is defined with '#define',
the directive must appear before 'Assert.h' is
included.
'assert' prints a diagnostic message when
expression evaluates to 'false' (0) and calls
abort to terminate program execution. No action is
taken if expression is 'true' (nonzero). The
diagnostic message includes the failed expression
and the name of the source file and line number
where the assertion failed.
Q: Can I
see an example of 'assert()'?
A: Here is a simple example and
the output. Consider the file is called 'test.cpp':
#include <assert.h>
int main()
{
int*
array = NULL;
assert(array !=
NULL);
// this should
fail
return 0;
}
output is:
Assertion failed:
array != NULL, file test.cpp, line 7
abnormal program termination
Q: Do
asserts work in release version also?
A: No, only in debug version. In
the release version of MFC, 'ASSERT' does not
evaluate the expression and thus will not
interrupt the program. If the expression must be
evaluated regardless of environment, use the
'VERIFY' macro in place of 'ASSERT'. Because of
this, never use a method that changes the state of
the program as the expression or part of the
expression of 'ASSERT'. In a release build,
'ASSERT' is not included in the code.
Q: What
should I do when I get a "Debug Assertion
Failed!" message?
A: Run your application in
debugger and when you get the message press
'Retry' to debug the application. Look in the
'call stack' window (Alt+7) and go to the first
(from top down) function written by you in the
stack and identify the line that triggers the
assertion failure.
Q: What
are common causes for assertion failures?
A: Most often it is the usage of
an invalid pointer or an attempt to index an array
beyond its boundaries.
Q: How
can 'ASSERT' help me with writing better code?
A: You build your application
first as a debug version and only when it is
finished you build the release version. 'ASSERT'
help you identify the errors in the execution
flow. You should always test pointers for
validity:
void Draw(int
index)
{
CFigure* pFigure = GetFigure(index);
// should return
a figure from a list
// if GetFigure returns NULL the next line of
code is faulty
pFigure->Draw ();
}
The correct way
is:
void Draw
(int index)
{
CFigure* pFigure = GetFigure(index);
ASSERT(pFigure !=
NULL);
// if pFigure ==
NULL you get an error message
if(pFigure
== NULL)
// this avoids
the usage of a NULL pointer
return;
pFigure->Draw ();
}
In this example,
I consider 'GetFigure()' a function that should
always return a valid figure. The role of 'ASSERT'
is to ensure that 'GetFigure()' actually does what
it supposed to do and always return a valid
pointer. Now if you wander what is the role of
if(pFigure
== NULL)
return;
the answer is to
make sure that if the debug build wasn't tested
enough and an error could occur in the release,
the program wouldn't crash because of the use of a
'NULL' pointer.
However, if 'GetFigure()' can return a 'NULL'
pointer, that pointer should not be asserted
against 'NULL'.
You should also test the index used for accessing
elements of arrays:
// this is a dummy
example
class foo
{
int elements[10];
public:
foo() { /* do
some initialization */ };
int getAt(int
index) const
{
ASSERT(index>=0
&& index<10);
if(index>=0
&& index<10)
return elements[index];
return -1;
// return a
default value
}
};
|