|
GDI+
Example: Using GDI+
Brushes to Draw Text
|
| |
|
Introduction
|
Tom
Archer - MSFT
October 19, 2004 |
|
One of the examples I
wrote in Extending MFC
Applications with the .NET
Framework illustrated
how to store and retrieve BLOB (binary large objects) to
and from a SQL Server database. These BLOBs were actually
image data that was rendered on the dialog when the user
selected them. Since then, I've had numerous requests to
illustrate more of the GDI+
capabilities from the Managed Extensions to C++
for .NET (MC++). Therefore, in this first in a
series of GDI+ articles,
I illustrate how to draw text
(both hatch and gradient) using GDI+
brushes.
Basic Steps to
Drawing Text with Brushes
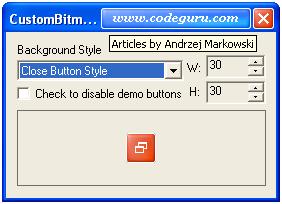
Provided with this article
is a demo application that allows the user to specify a
text value, the font size, whether the text
is drawn with a hatch
or gradient brush, and the colors to use in drawing
the text. Here's a
screen shot of that application:
Here are some basic
steps for drawing
either hatched or gradient text using GDI+:
-
Add an event
handler for the control's Paint event.
You should do your drawing in this method (or a method
called from this method) so that your control is
repainted properly.
-
Obtain a
Graphics object.
For those of you familiar with drawing on device
contexts, the Graphics
object is the .NET
encapsulation of a drawing surface. When drawing on a
control—such as a PictureBox—you could call
the PictureBox::CreateGraphics method as it
returns a Graphics
object for you to draw on. In fact, I've seen this
technique on various demo/sample applications on the
Web. However, the problem with it is that the Graphics
object is not persistent. Therefore, the control
doesn't paint itself properly when the user switches
to another application and then back again. So, you
should use the Graphics object of the PaintEventArgs
object that is passed to the control's Paint
method.
private: System::Void picText_Paint(System::Object *  sender,
                                    System::Windows::Forms::
                                    PaintEventArgs *  e)
{
   ...

   Graphics* g = e->Graphics;
-
Instantiate a Font
object.
Of the 13 different Font
constructors, the most basic one requires that you
supply the font
type face name and the font size. In the following example,
I create a 20 point, regular (as opposed to bold,
italic, and so forth) font using the "Times New
Roman" type face:
using namespace System::Drawing;
...
Font* font = new Font(S"Times new Roman", 20,
                      FontStyle::Regular);
-
Measure the
text to be rendered. You need to measure the text
to render it. As I illustrated in my article Managed
Extensions: Measuring Strings, you use the Graphics::MeasureString
to accomplish this tucancode.net. This method takes the text to
be measured and the font being used and returns a SizeF
structure, which simply defines the dimensions needed
to draw the text.
SizeF textSize = g->MeasureString(S"My Sample Text", font);
-
Instantiate a
Brush object.
You can draw with various types of Brush
objects, including HatchBrush,
LinearGradientBrush, PathGradientBrush,
SolidBrush, and TextureBrush. As the
parameters to instantiate the various Brush
objects are only slightly different, I won't attempt
to cover each and every one. Instead, I'll present examples
of the two types of Brush objects (HatchBrush
and LinearGradientBrush)
that are used in this article's demo application,
which allows the user to select the Brush type
to use in drawing their specified text.
Brush* brush = new HatchBrush(HatchStyle::Cross,
Color::Black, Color::Blue);
RectangleF* rect = __nogc new RectangleF(PointF(0, 0), textSize);
brush = new LinearGradientBrush(*rect,
Color::Black,
Color::Blue,
LinearGradientMode::
ForwardDiagonal);
-
[Optional]
Fill the background.
You typically need to initialize the background before
you draw on it. There are two standard ways of doing
this. The easiest is to simply call the Graphics::Clear
method and specify the desired color that you will use
to fill the entire drawing
surface. However, sometimes you need a finer level of
control. In those cases, you can use the Graphics::FillRectange
method.
The Graphics::FillRectange
method enables you to specify a Brush object of
your choosing as well as the exact rectangular
coordinates to use. Regarding the Brush object,
you can either instantiate a custom Brush or
use the SystemBrushes object, which defines
property members that are each a SolidBrush
representation of a Windows display element. These are
the elements that are defined via the Windows Display
Properties and include ActiveBorder, ActiveCaption,
and so on:
g->FillRectangle(SystemBrushes::Control,
picText->Left,
picText->Top,
picText->Right - picText->Left,
picText->Bottom - picText->Top);
g->Clear(Color::White);
-
Render (Draw)
the Text.
Once you have all the GDI+ objects
instantiated, you need only call the Graphics::DrawString
method. Here's an example
call to that method where I specify the text to
render, the Font and Brush objects to
use, and exactly where on the drawing surface I want
the text displayed:
g->DrawString(txtToDisplay->Text,
font,
brush,
(picText->Width - textSize.Width) / 2,
(picText->Height - textSize.Height) / 2);
About the Author
I am a Program Manager and Content Strategist for the
Microsoft MSDN Online team managing the Windows Vista and Visual
C++ developer centers. Before being employed at
Microsoft, I was awarded MVP status for the Visual
C++ product. A 20+ year veteran of programming
with various languages - C++, C, Assembler,
RPG III/400, PL/I, etc. - I've also written many technical
books (Inside C#, Extending MFC
Applications with the .NET Framework, Visual
C++.NET Bible, etc.) and 100+ online articles.
Downloads
GDIPlusTextWithBrushes.zip
- Download source code
- 41 Kb
|